MINImill Drawing Module

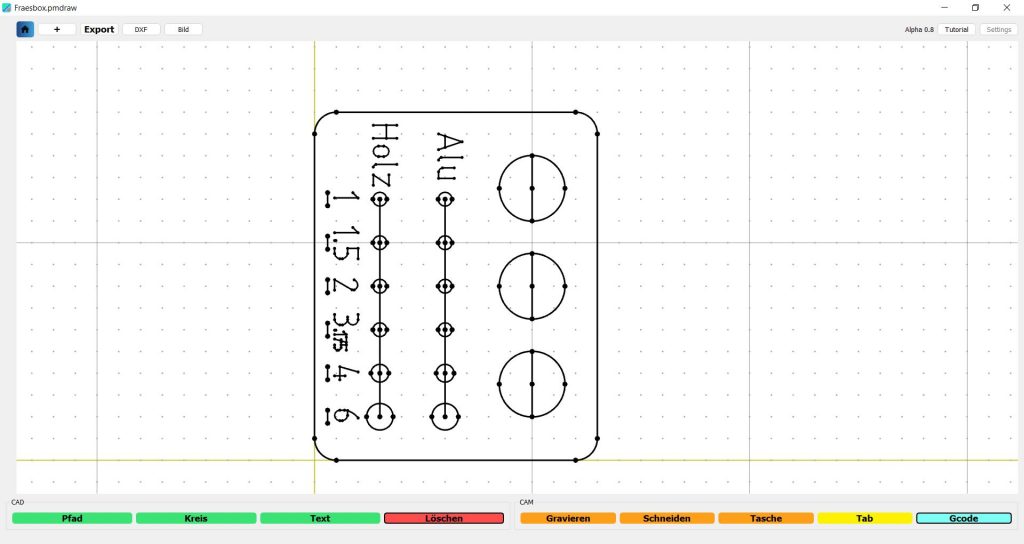
The MINImill drawing module allows you to create your own drawings and can also import images and DXF files.

Control Functions

The following functions control the user interface.

  • Left Mouse Button: Select, Click
  • Right mouse button: Cancel
  • Mouse wheel: zoom and change drawing grid resolution
  • Arrow keys: move canvas
  • Q: With the Q key you can change the mode, selectable modes are displayed at the top of the menu – e.g.: Circle: arc of a circle or full circle, clipping: inside or outside
  • Create, save and load project

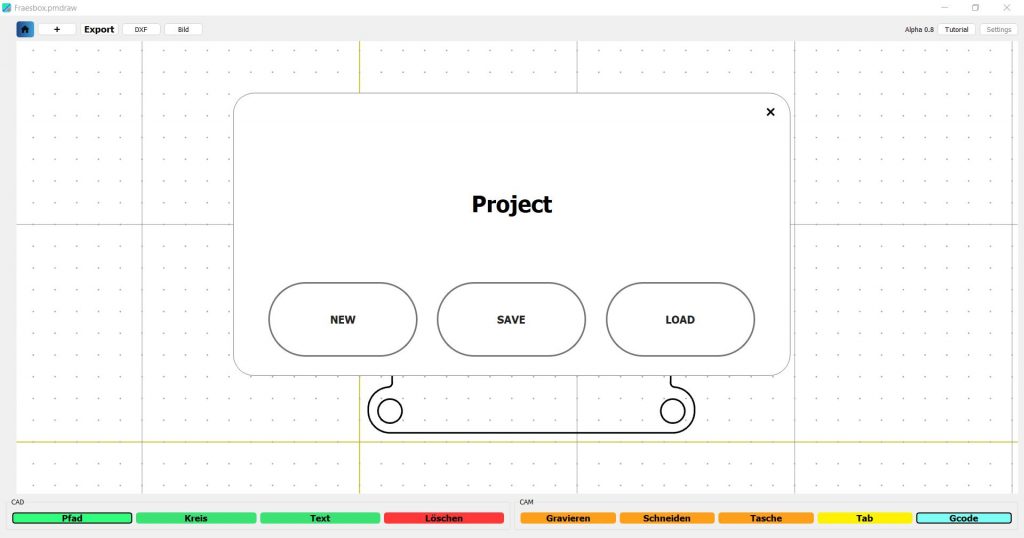
    By clicking on the “+” button you can create, save or load projects. Save your drawing regularly.

    Geometry Functions

    The MINImill CAD CAM module offers the following geometry functions:

  • Path: allows you to draw lines and polylines
  • Circle: allows you to draw arcs and circles
  • Text: Creates engraving texts in different fonts
  • Line

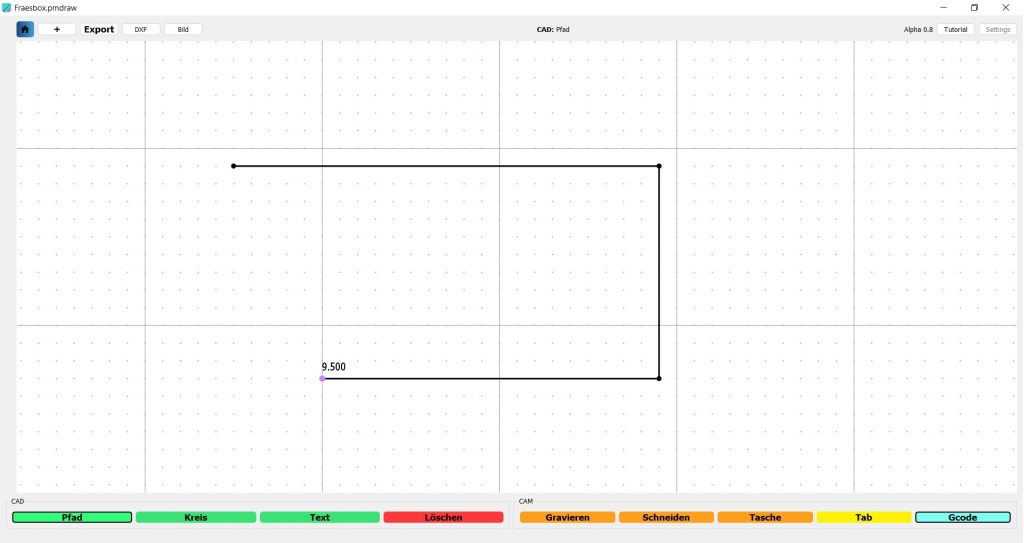
    Click on Path to draw lines and polylines. The line endpoints stick to the displayed grid of points. By zooming (scrolling with the mouse wheel) you can change the resolution of the grid and draw finer dimensions.

  • Click on the left mouse button to start the line at the current point
  • Click on the right mouse button to end the line or polyline
  • Circle

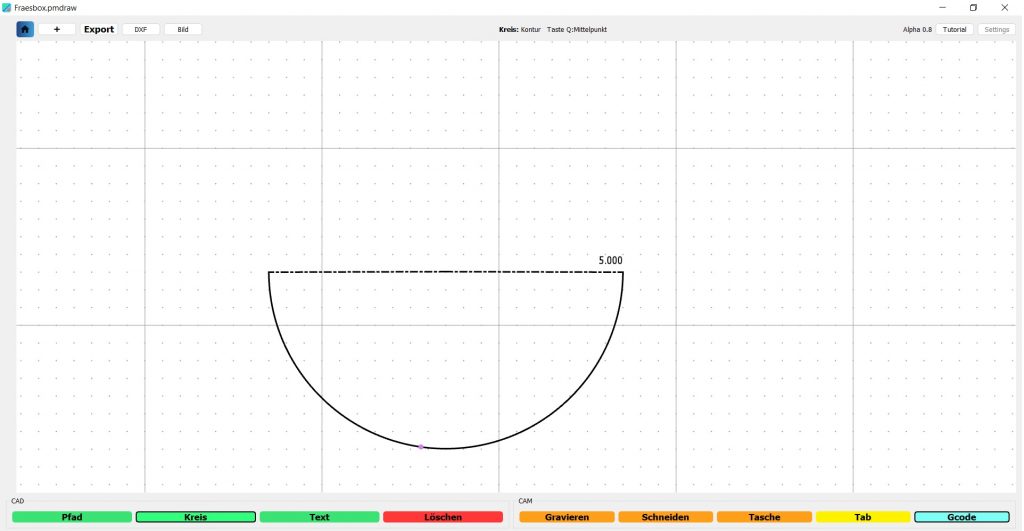
    Circles are drawn using the chord of a circle. First click on the first point of the chord, then on the 2nd and then drag out the circle.

  • Full circles: Full circles are drawn from two halves of a circle
    or by switching directly to a full circle (Q key switches between partial circle and full circle)
  • Roundings: first draw the lines and then the rounding (select contour mode with the Q key – is displayed in the menu at the top)
  • 1. Click on the left mouse button: chord starts, 2nd click on the left mouse button: chord finished, 3rd click on the left mouse button: set arc
  • Zoom (scroll with the mouse wheel) to set the grid size, click on the right mouse button: Cancel
  • Text

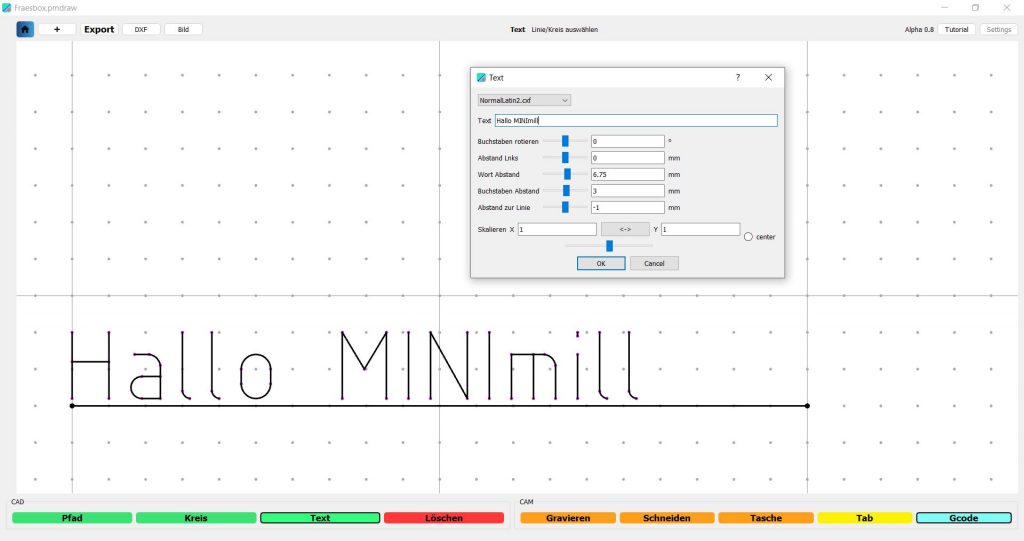
    With the text module you can create engraving texts in different fonts. Text always needs a line or a circle on which the text is built. Ie. You must first draw a polyline and click on it for the text to be drawn on that line.

  • Draw a line, click the text button, select the line and enter the text in the dialog box
  • Optionally you can change the font in the dialog window, rotate and scale the font
  • Delete

    You can erase drawn elements using Erase mode.

  • Delete individual elements: With the “Delete” mode activated, click individual elements